Self-Service API Postman collection
Follow this tutorial to test Amadeus Self-Service APIs using our dedicated Postman collection.
Pre-requisites
Before you begin, you need to:
- Register your application with Amadeus for Developers as described in Making your first API call.
- Create a new Postman account or use your existing Postman account.
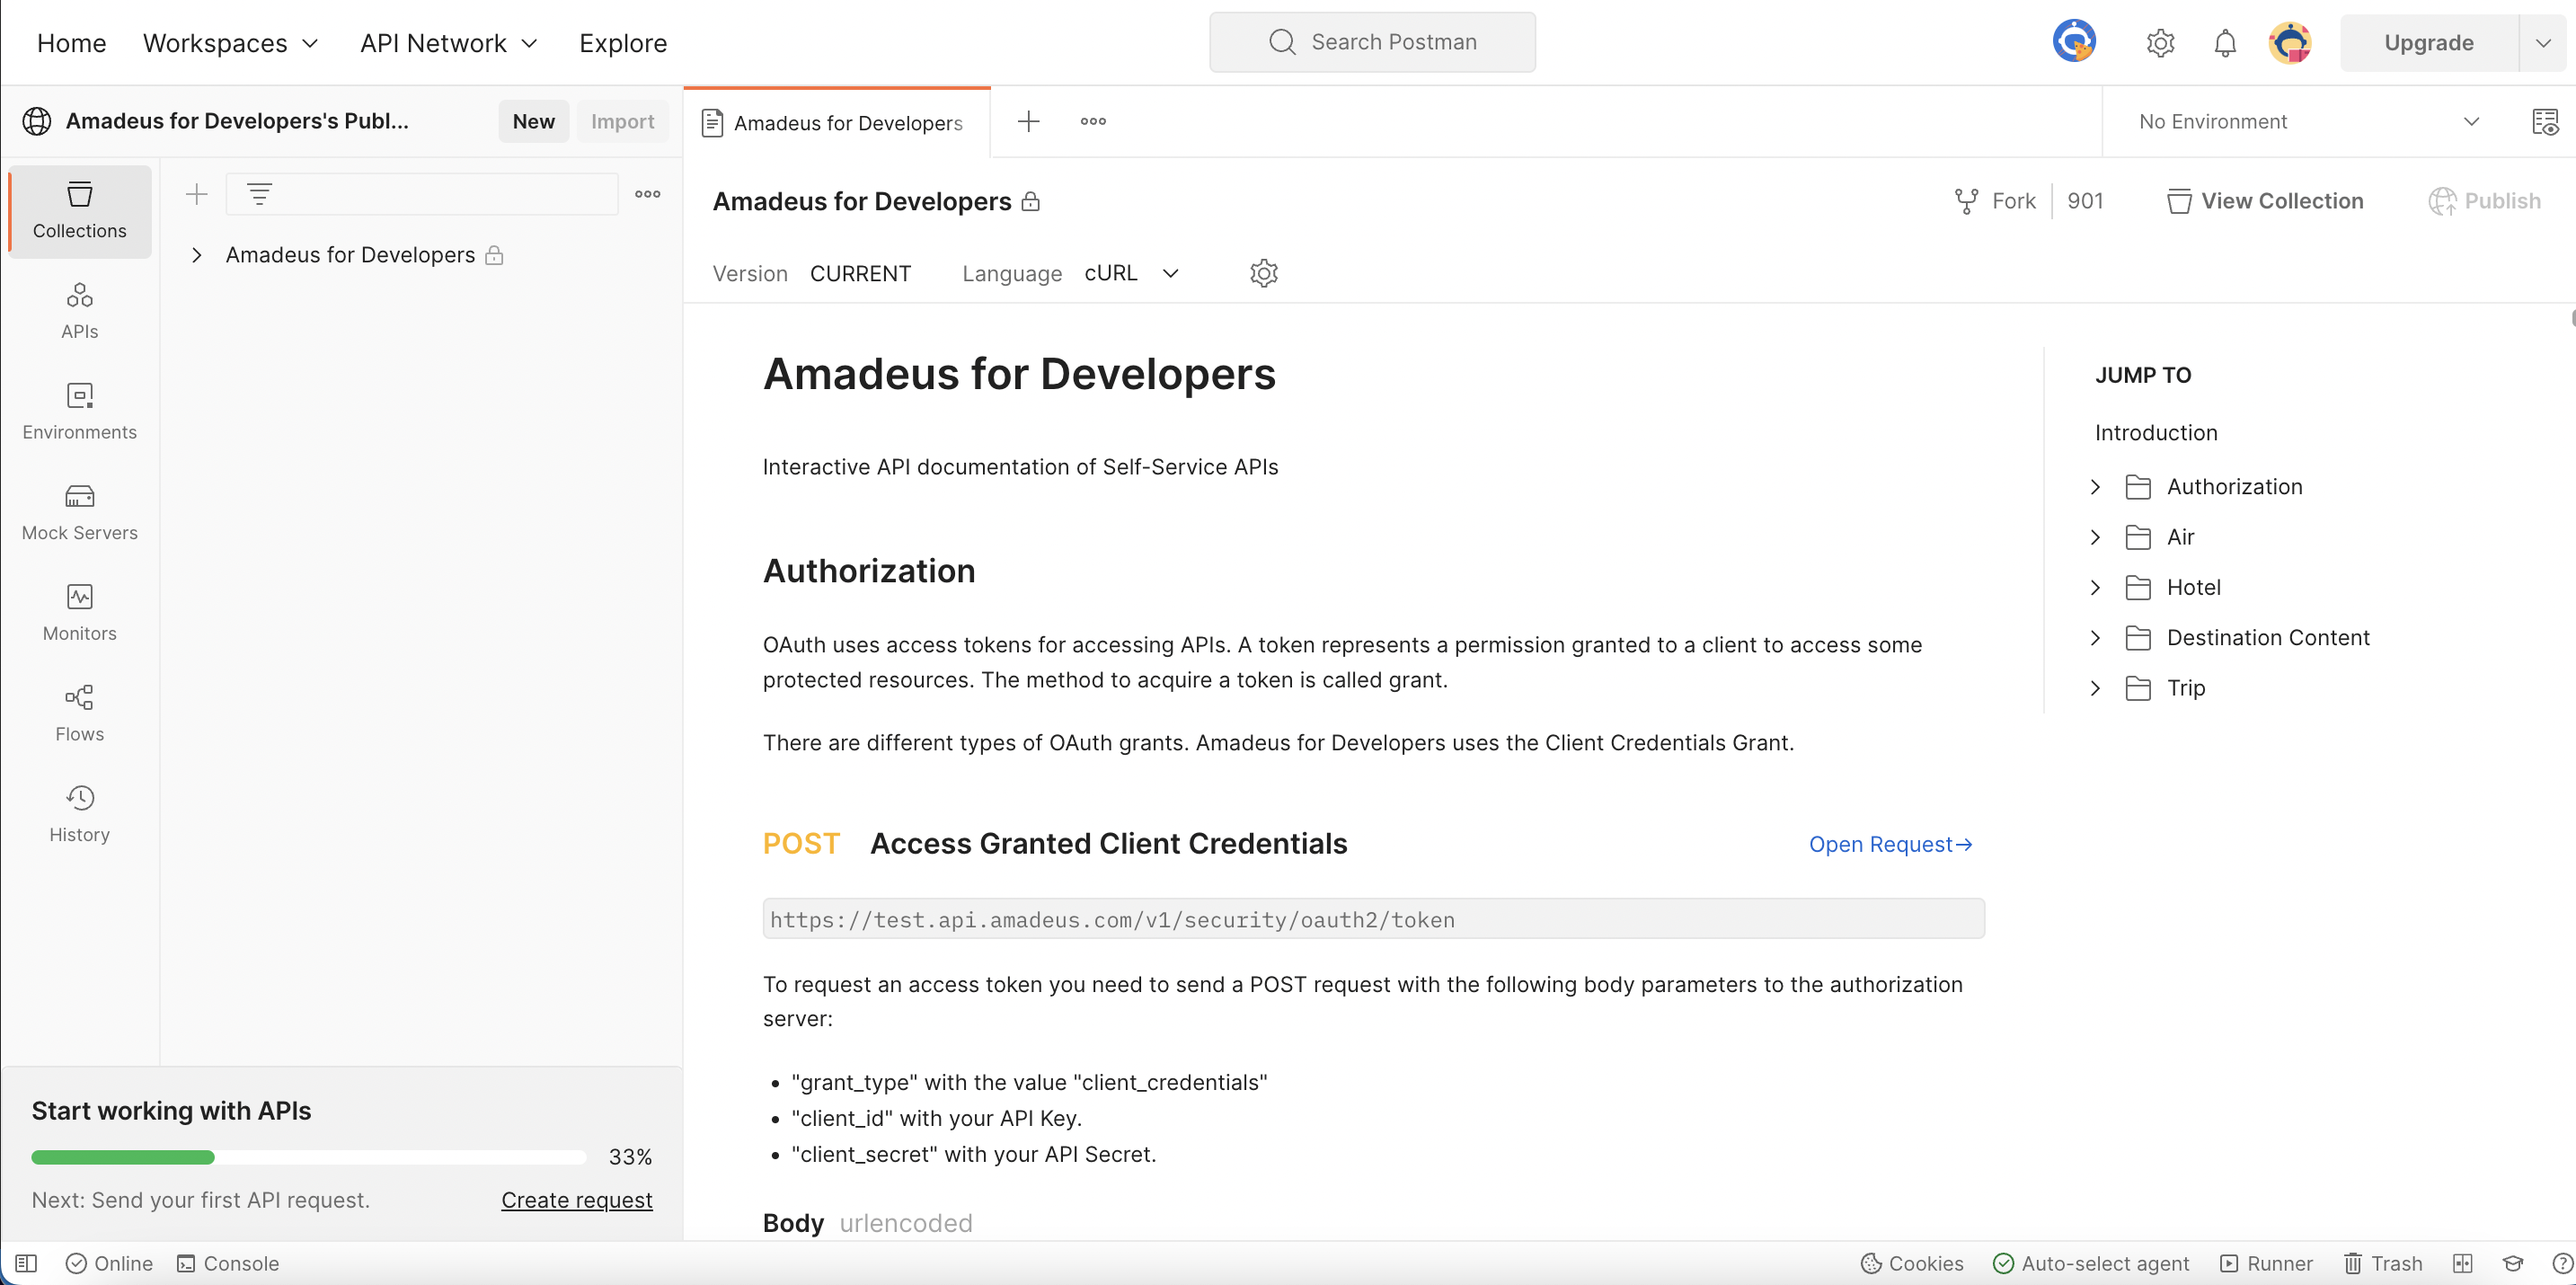
Fork the collection
- Login to Postman.
-
Navigate to the Amadeus for Developers public workspace.
-
Click Fork.
-
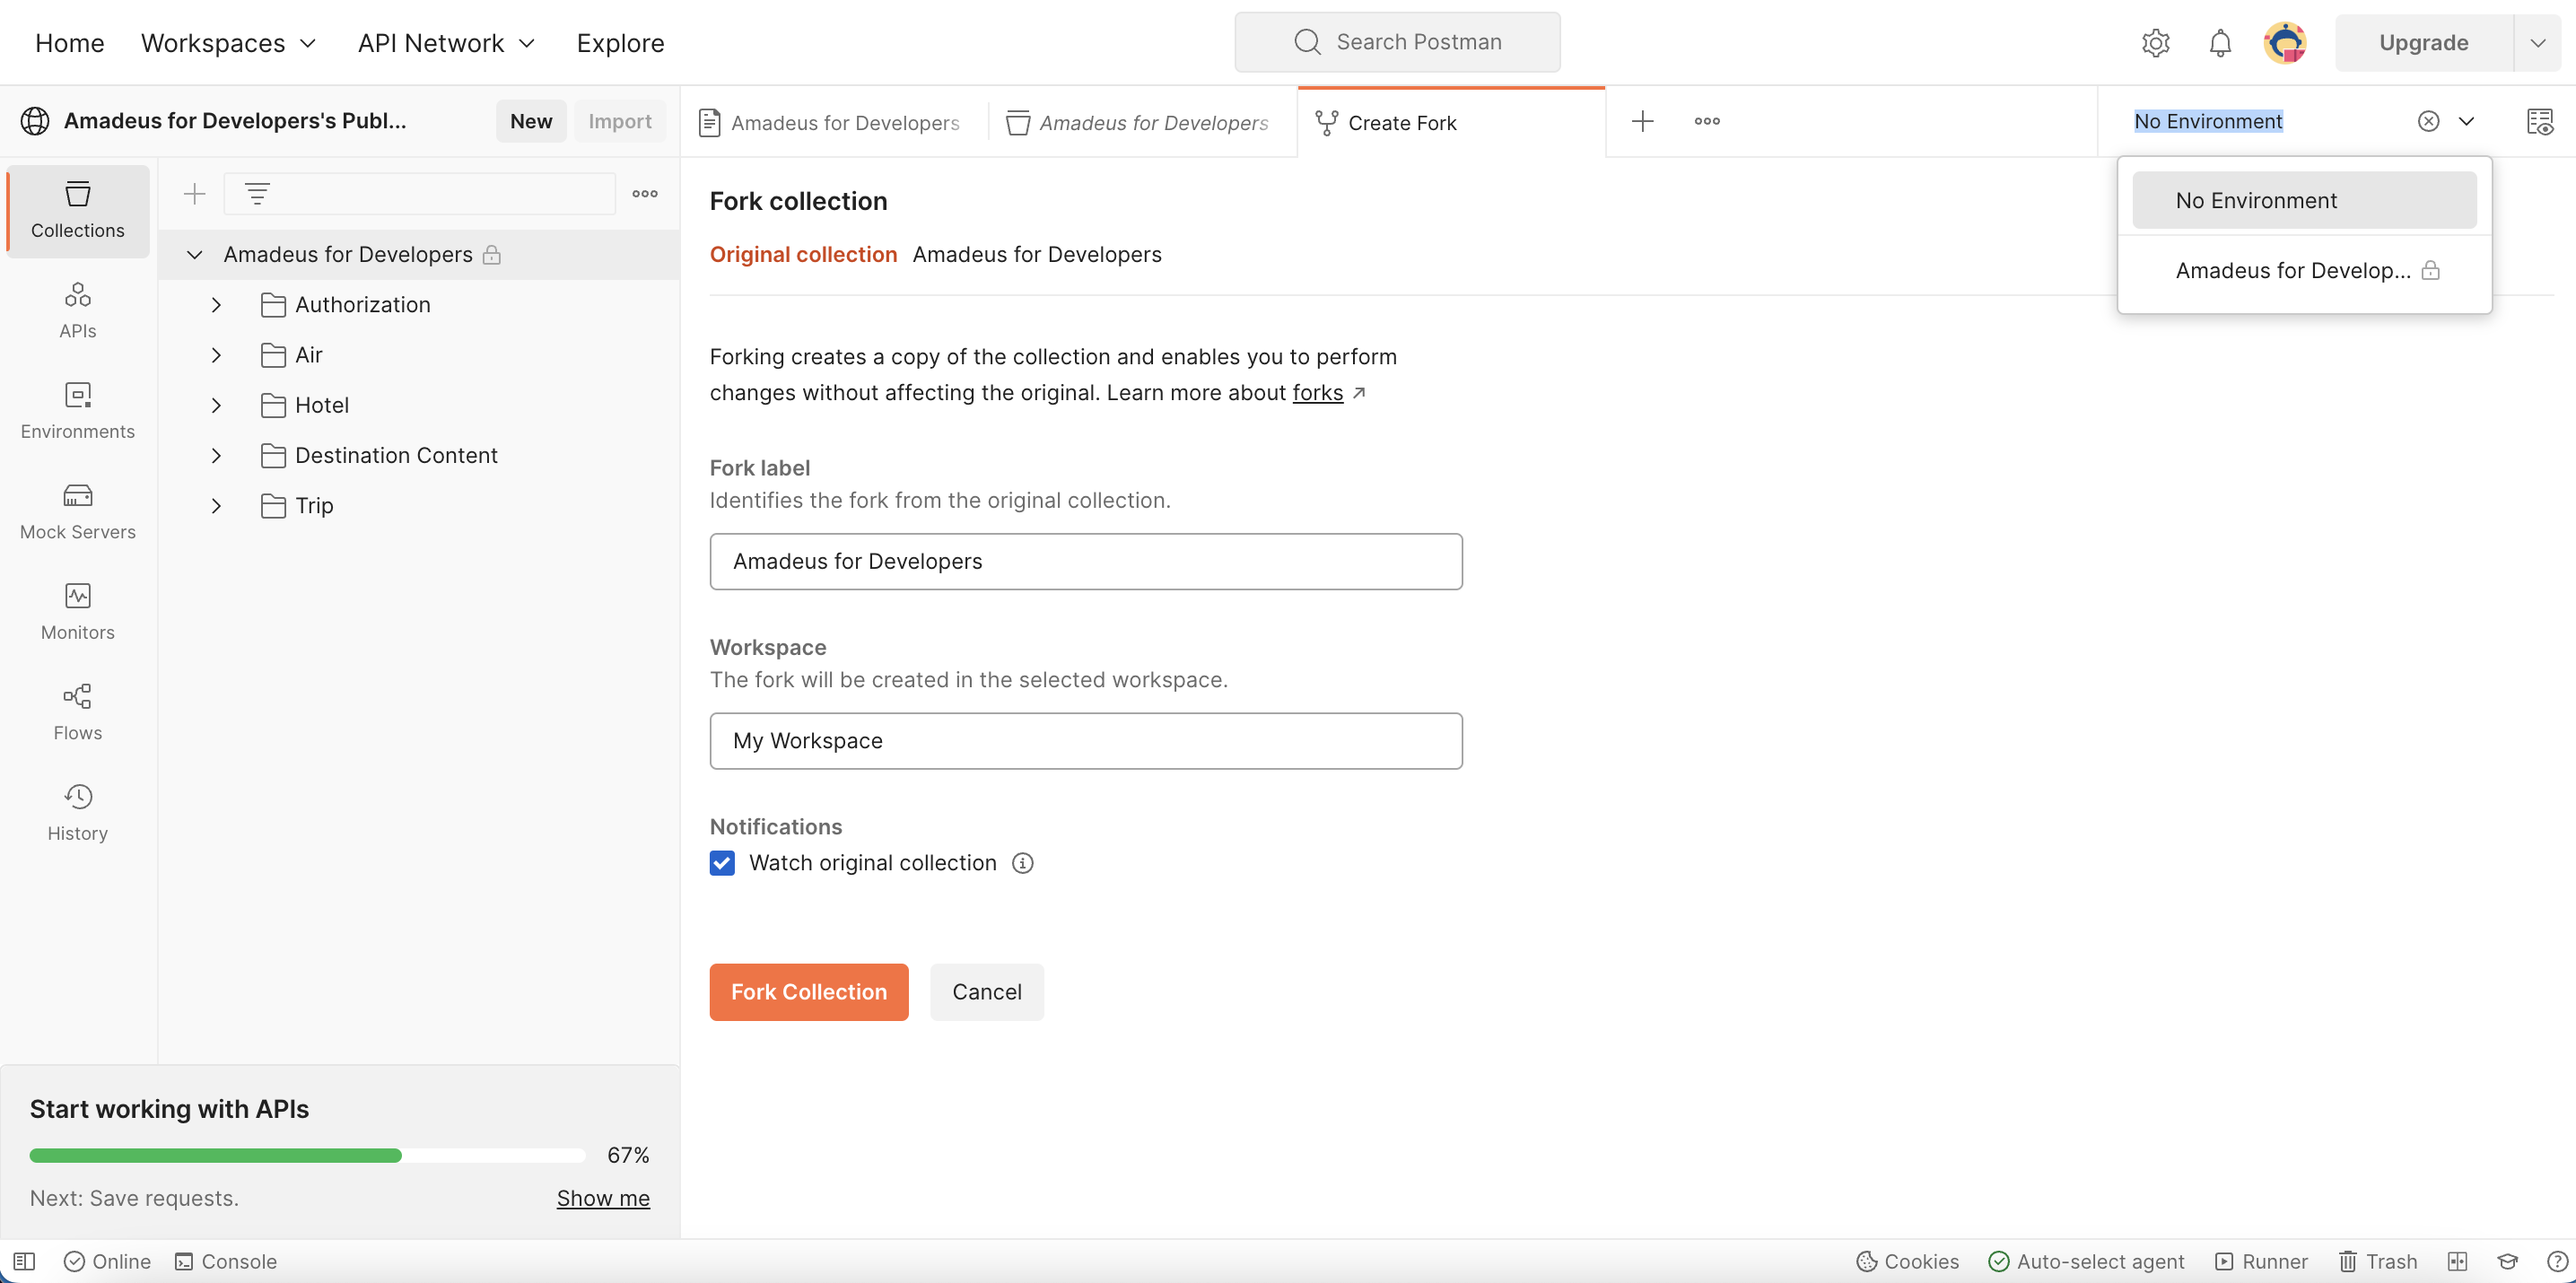
Select Amadeus for Developers from the Environment dropdown.
-
Give the fork a name.
- Select the workspace where you need to fork the collection to.
- Tick the Watch original collection box to get notified when the collection is updated.
- Click Fork Collection. You will be taken to the workspace that you selected previously.
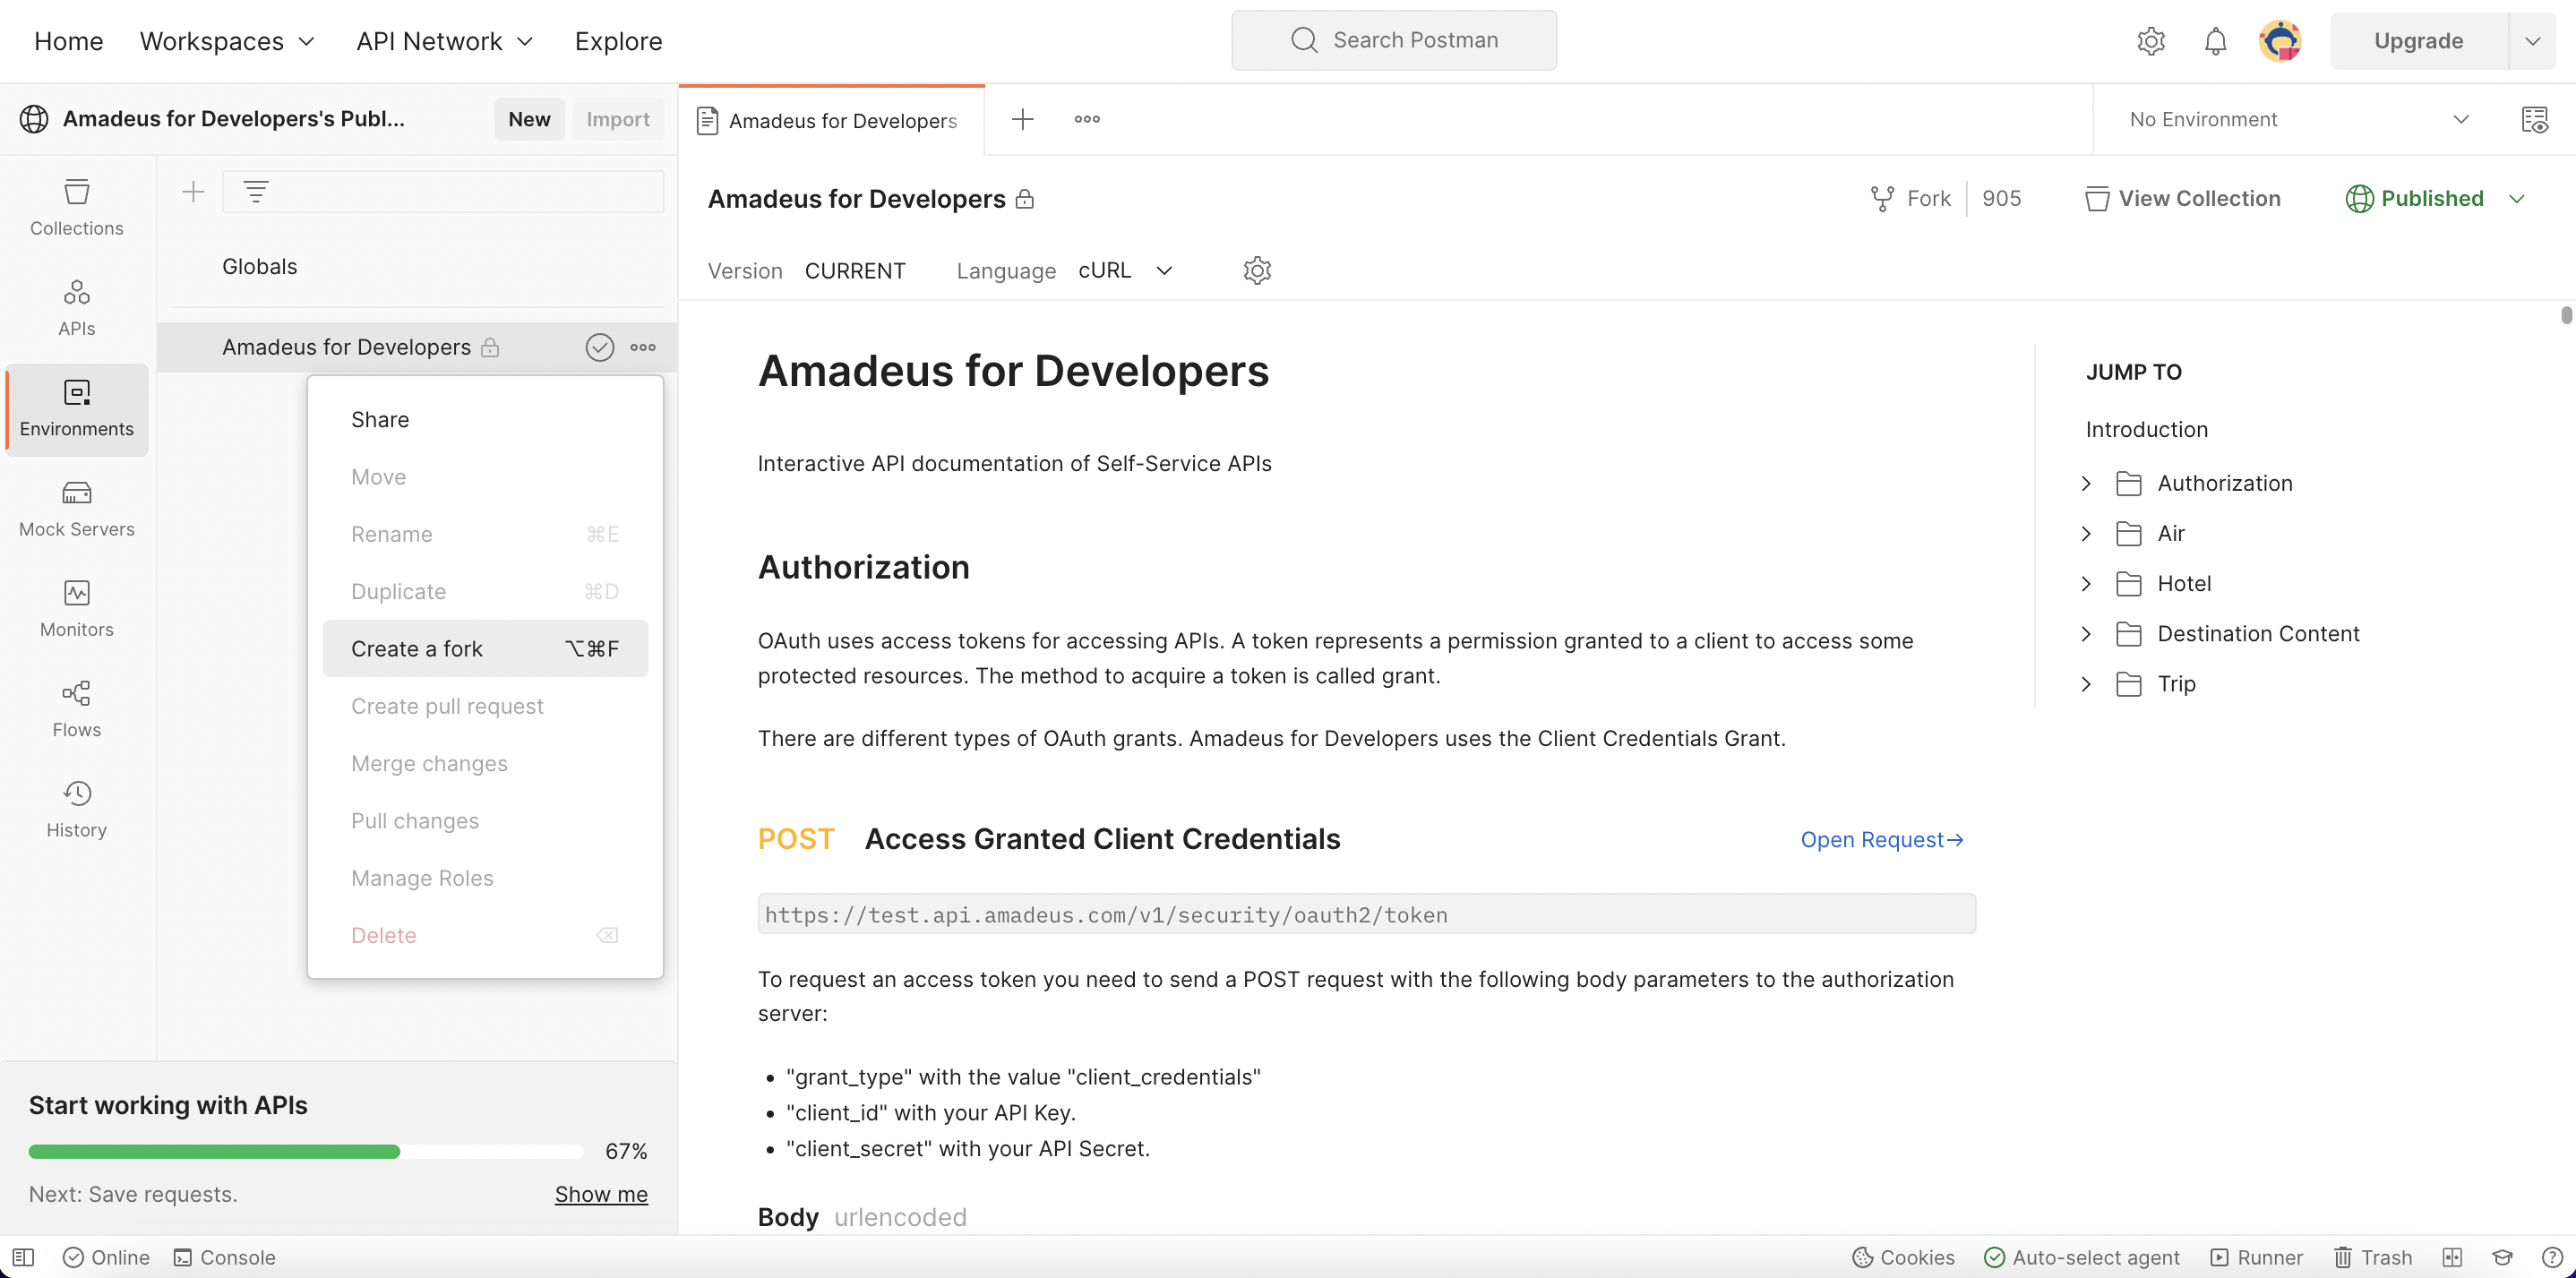
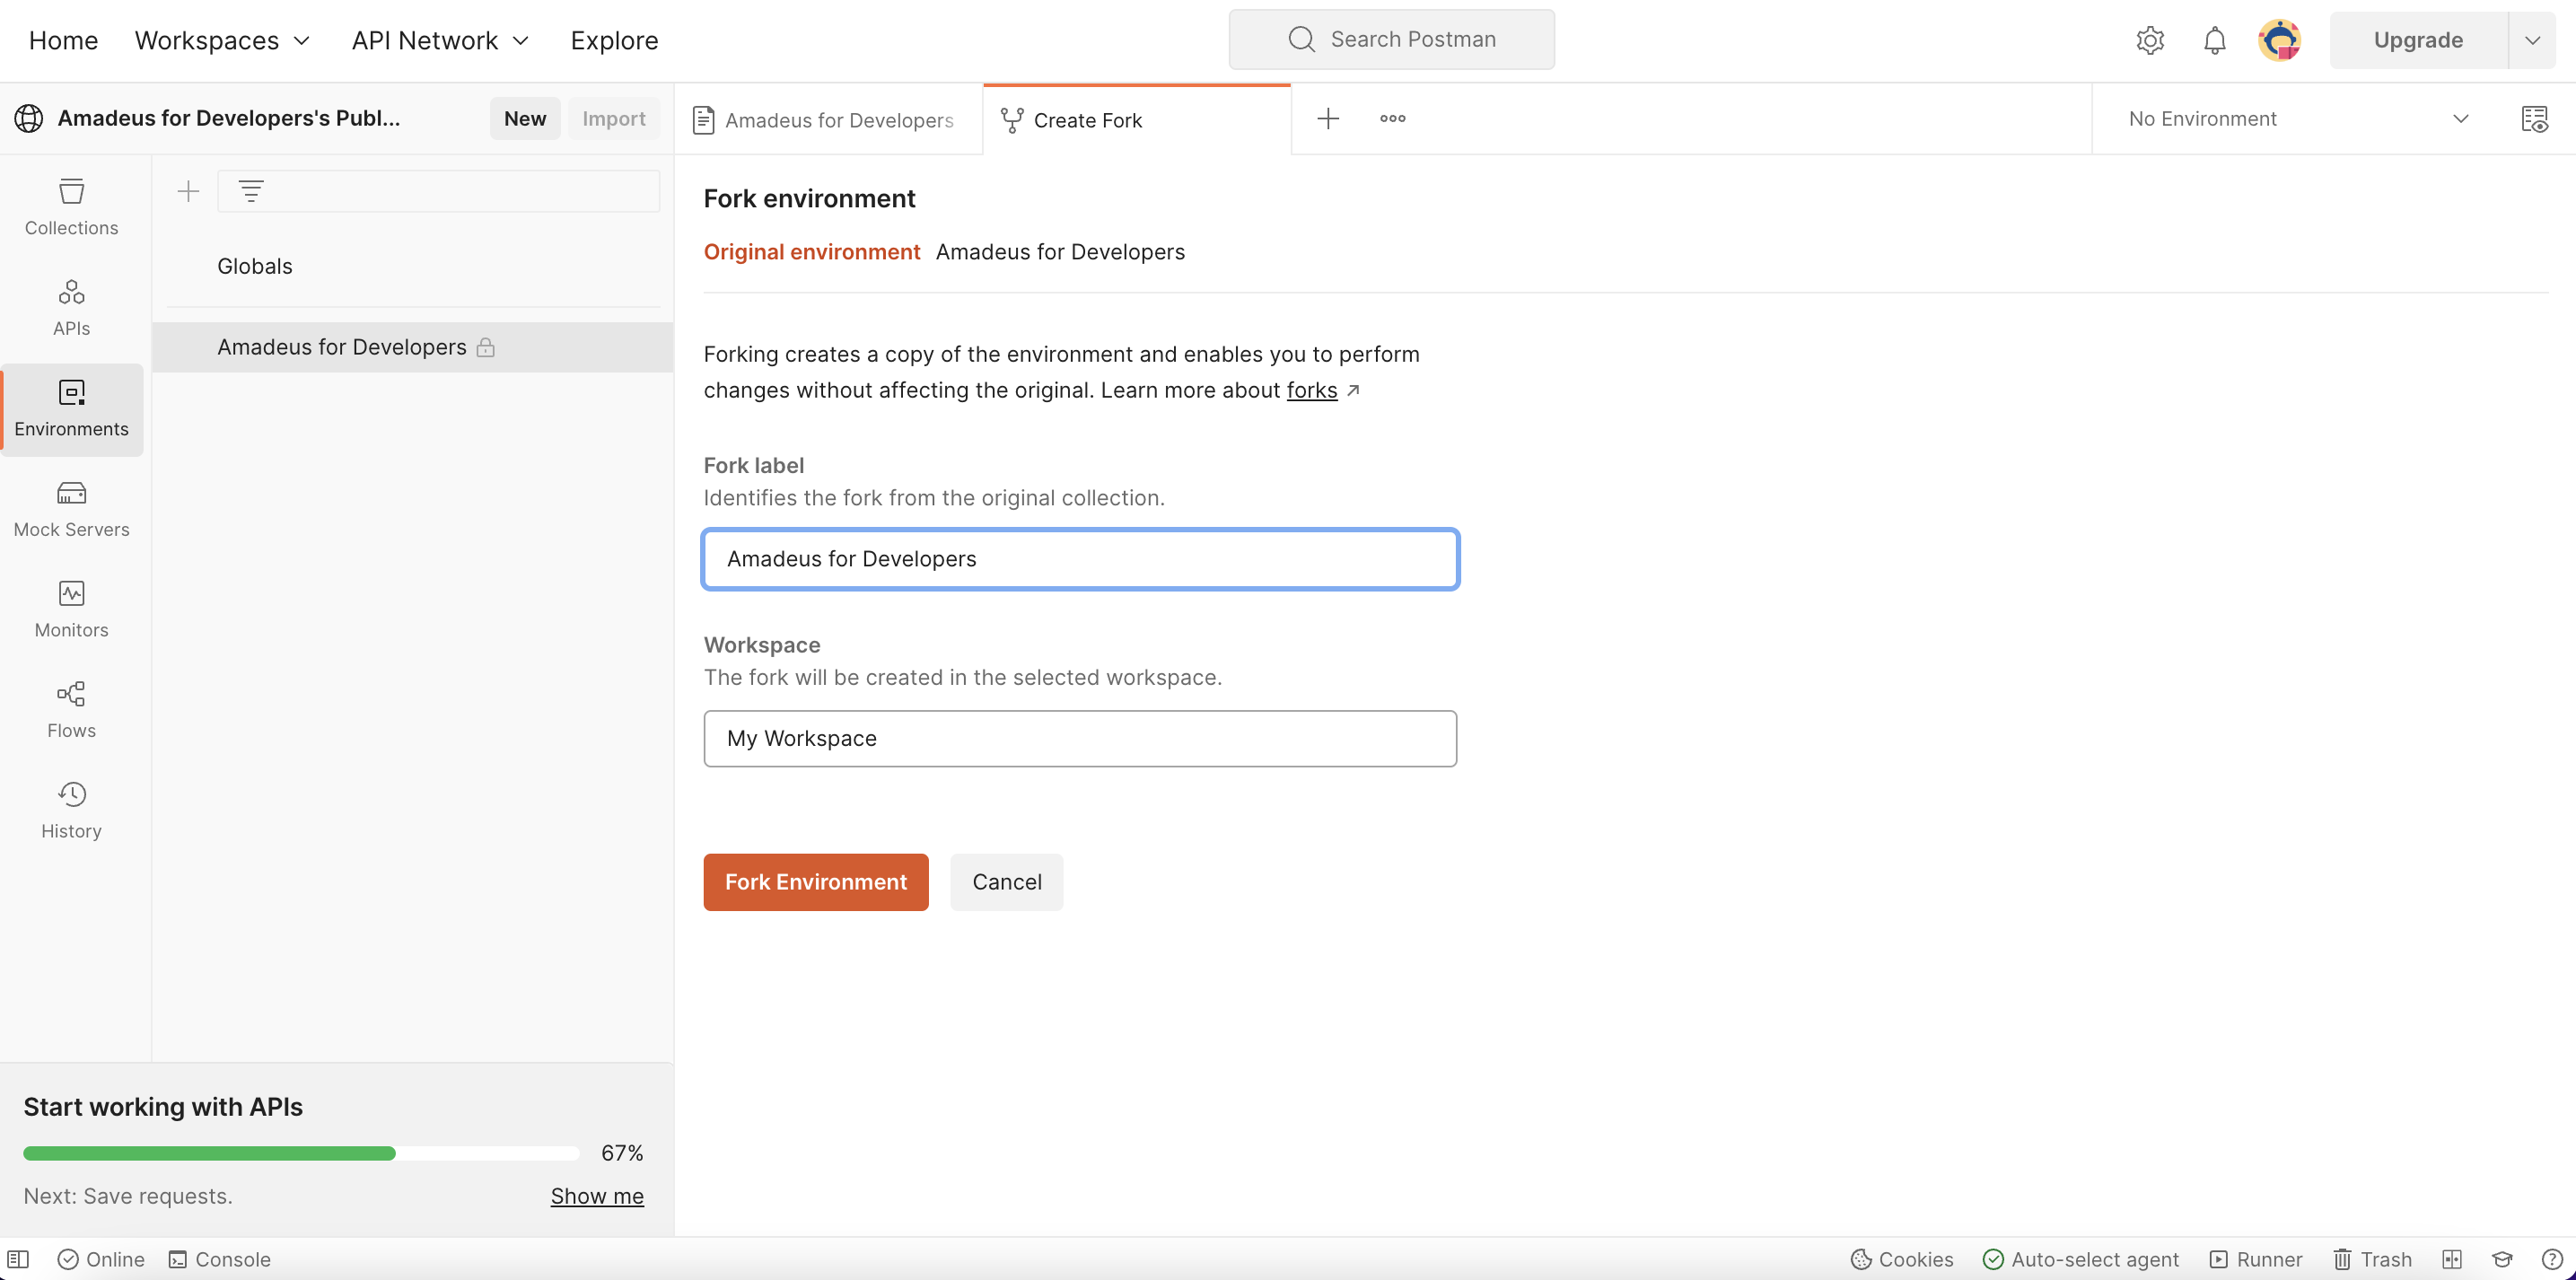
Fork the environment
-
Navigate to the Amadeus for Developers public workspace.
-
On the left side bar, click Environments.

-
Select ... beside the Amadeus for Developers envoronment and select Create a fork.
-
Give the fork a name.
-
Select the workspace where you need to fork the collection to.
- Click Fork Environment. You will be taken to the workspace that you selected previously.
Generate the access token
-
On the right side bar, set the environment to Amadeus for Developers.
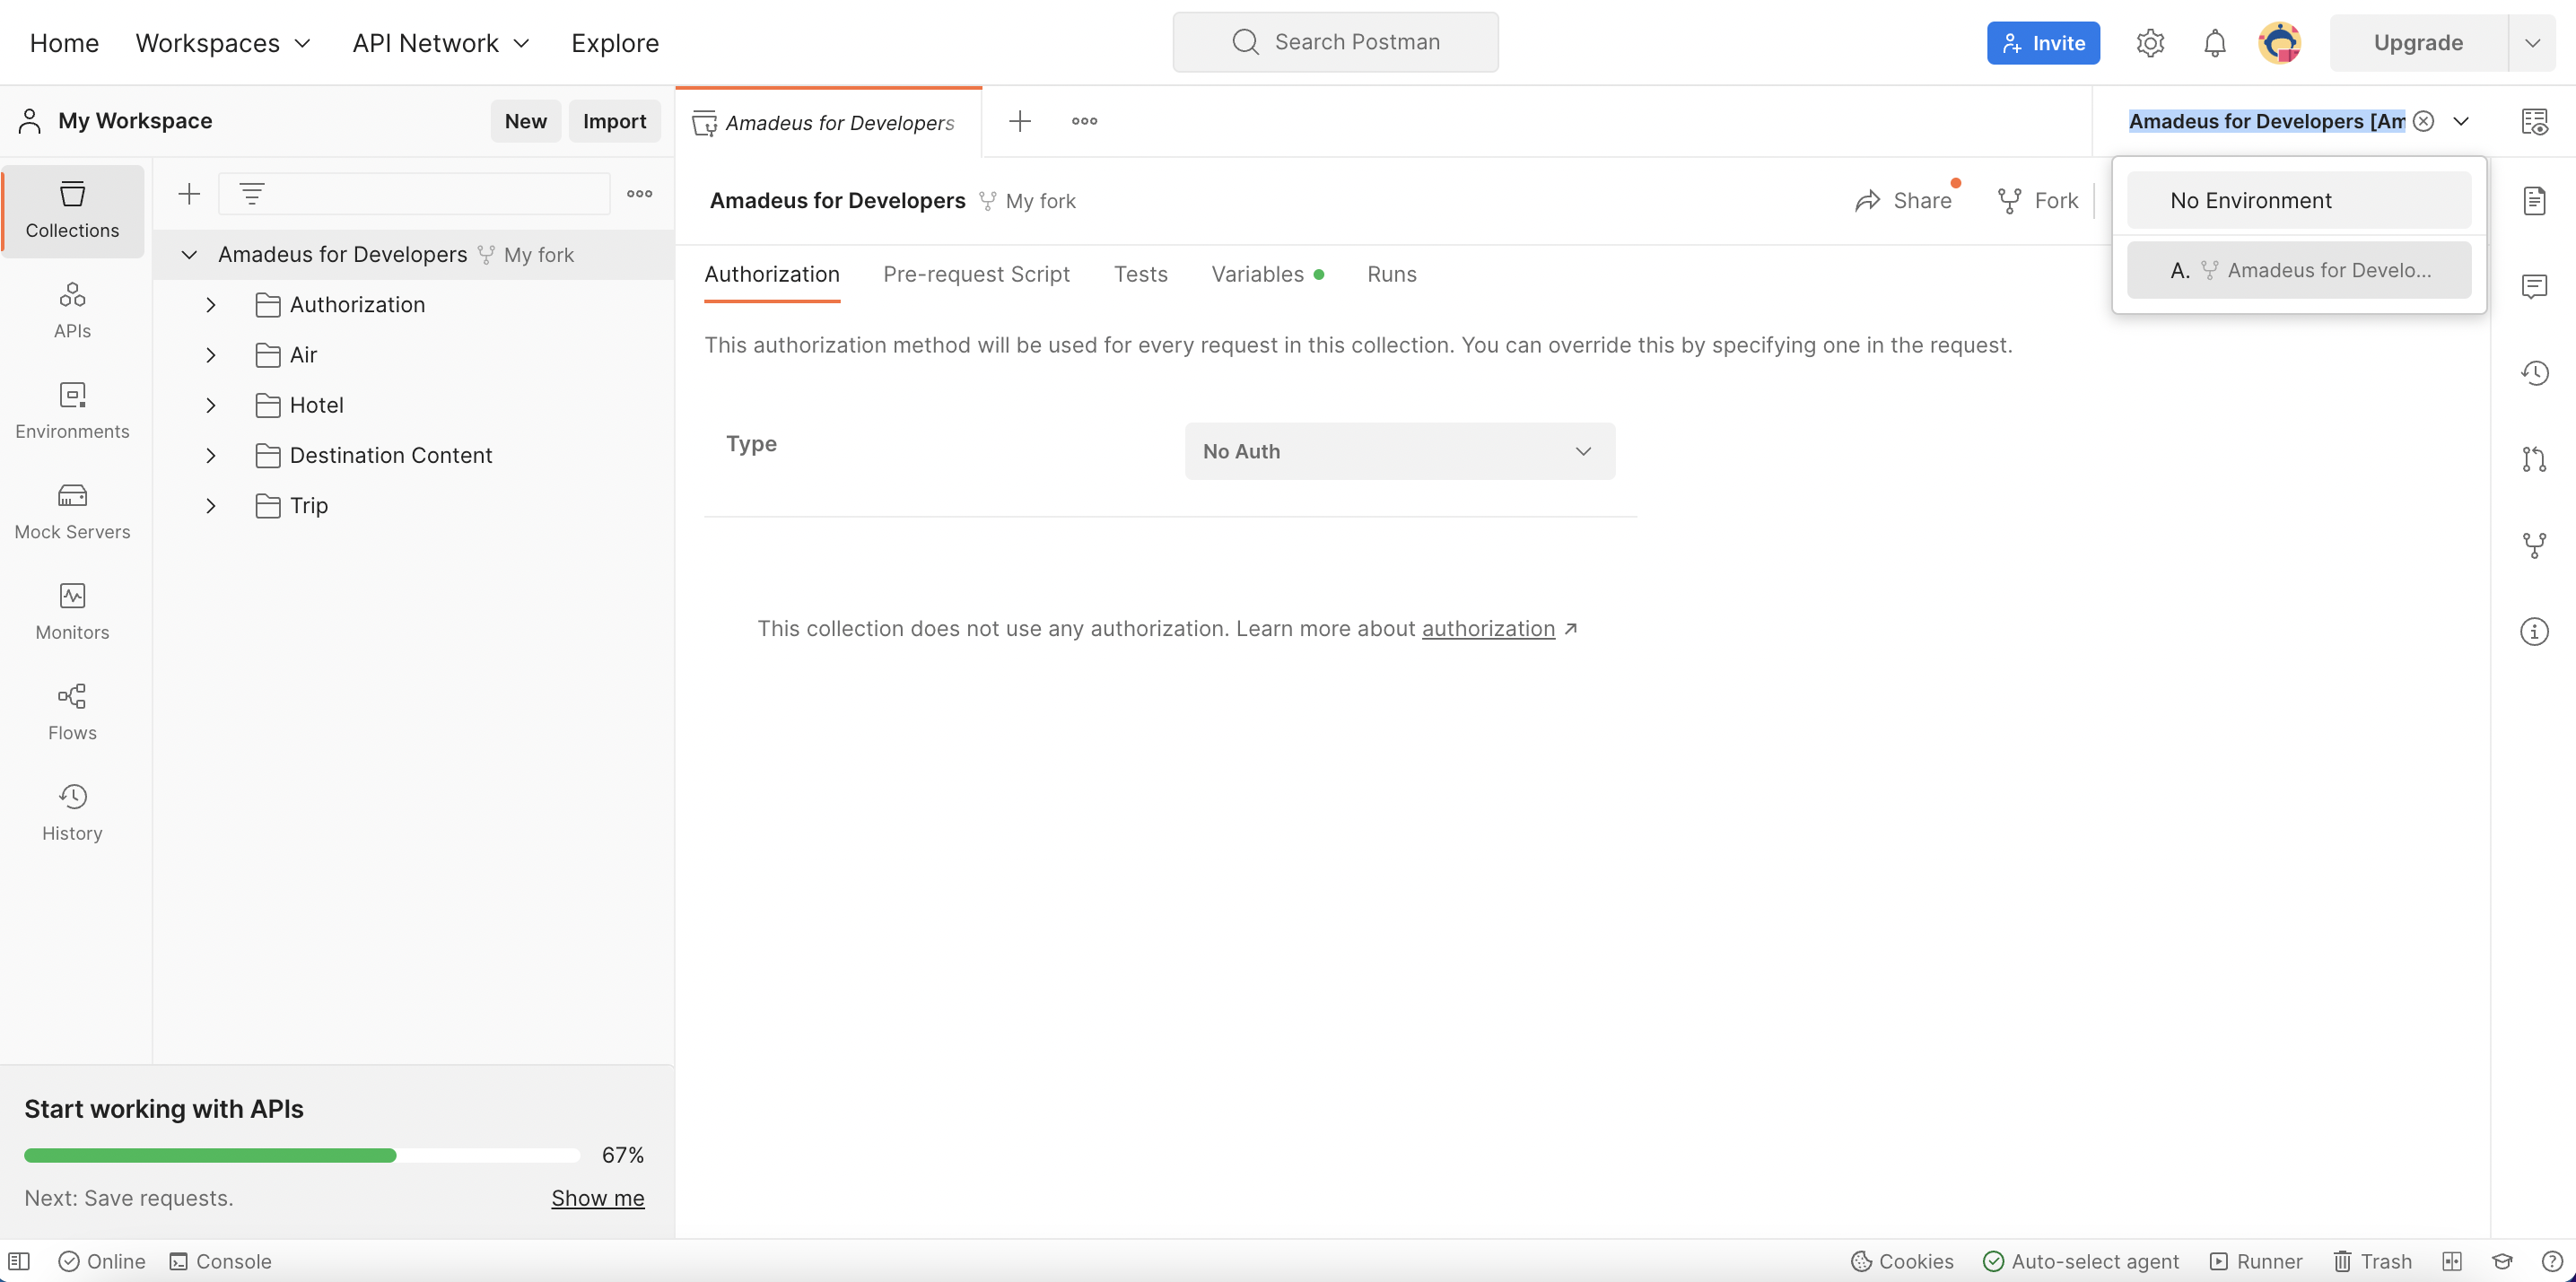
-
On the left side bar, click Environments.
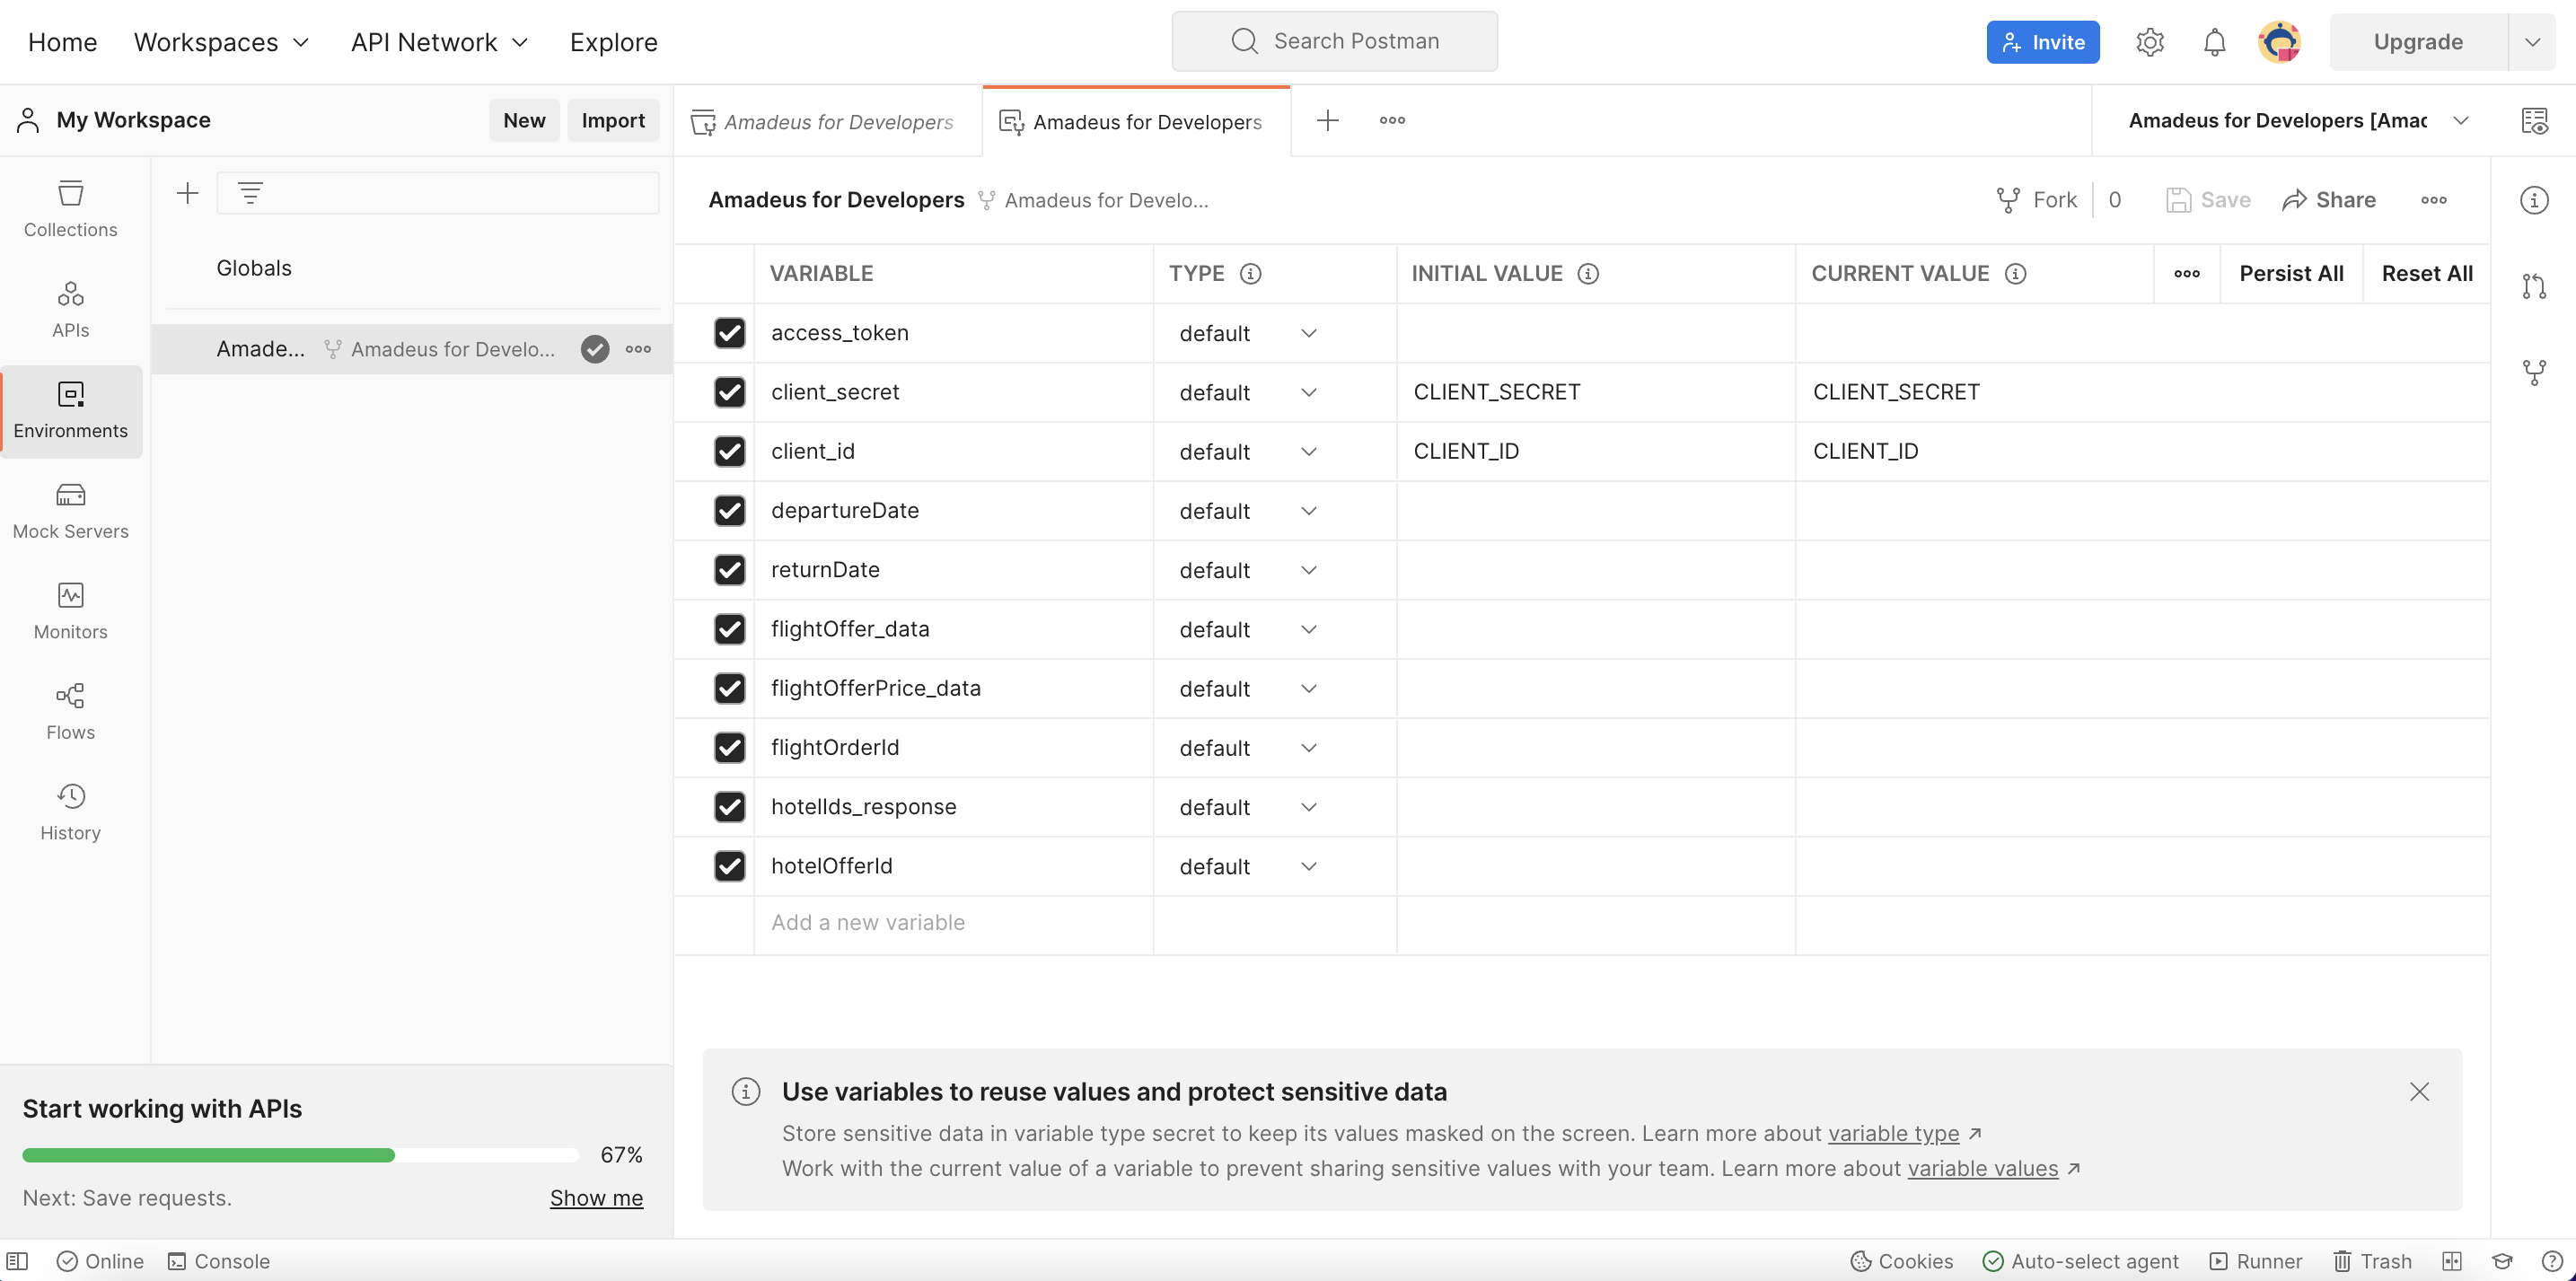
-
Enter you API key and secret values into the Current values of the
client_idandclient_secretparameters respectively. - Click Save.
- On the left side bar, navigate to Collections.
- Select the Authorization > Access Granted Client Credentials.
- Click Send without filling out any parameters.
- You will receive the access_token value in the response.
Note
The token is valid for 30 minutes and you must perform the previous step every 30 minutes to generate a new access token.
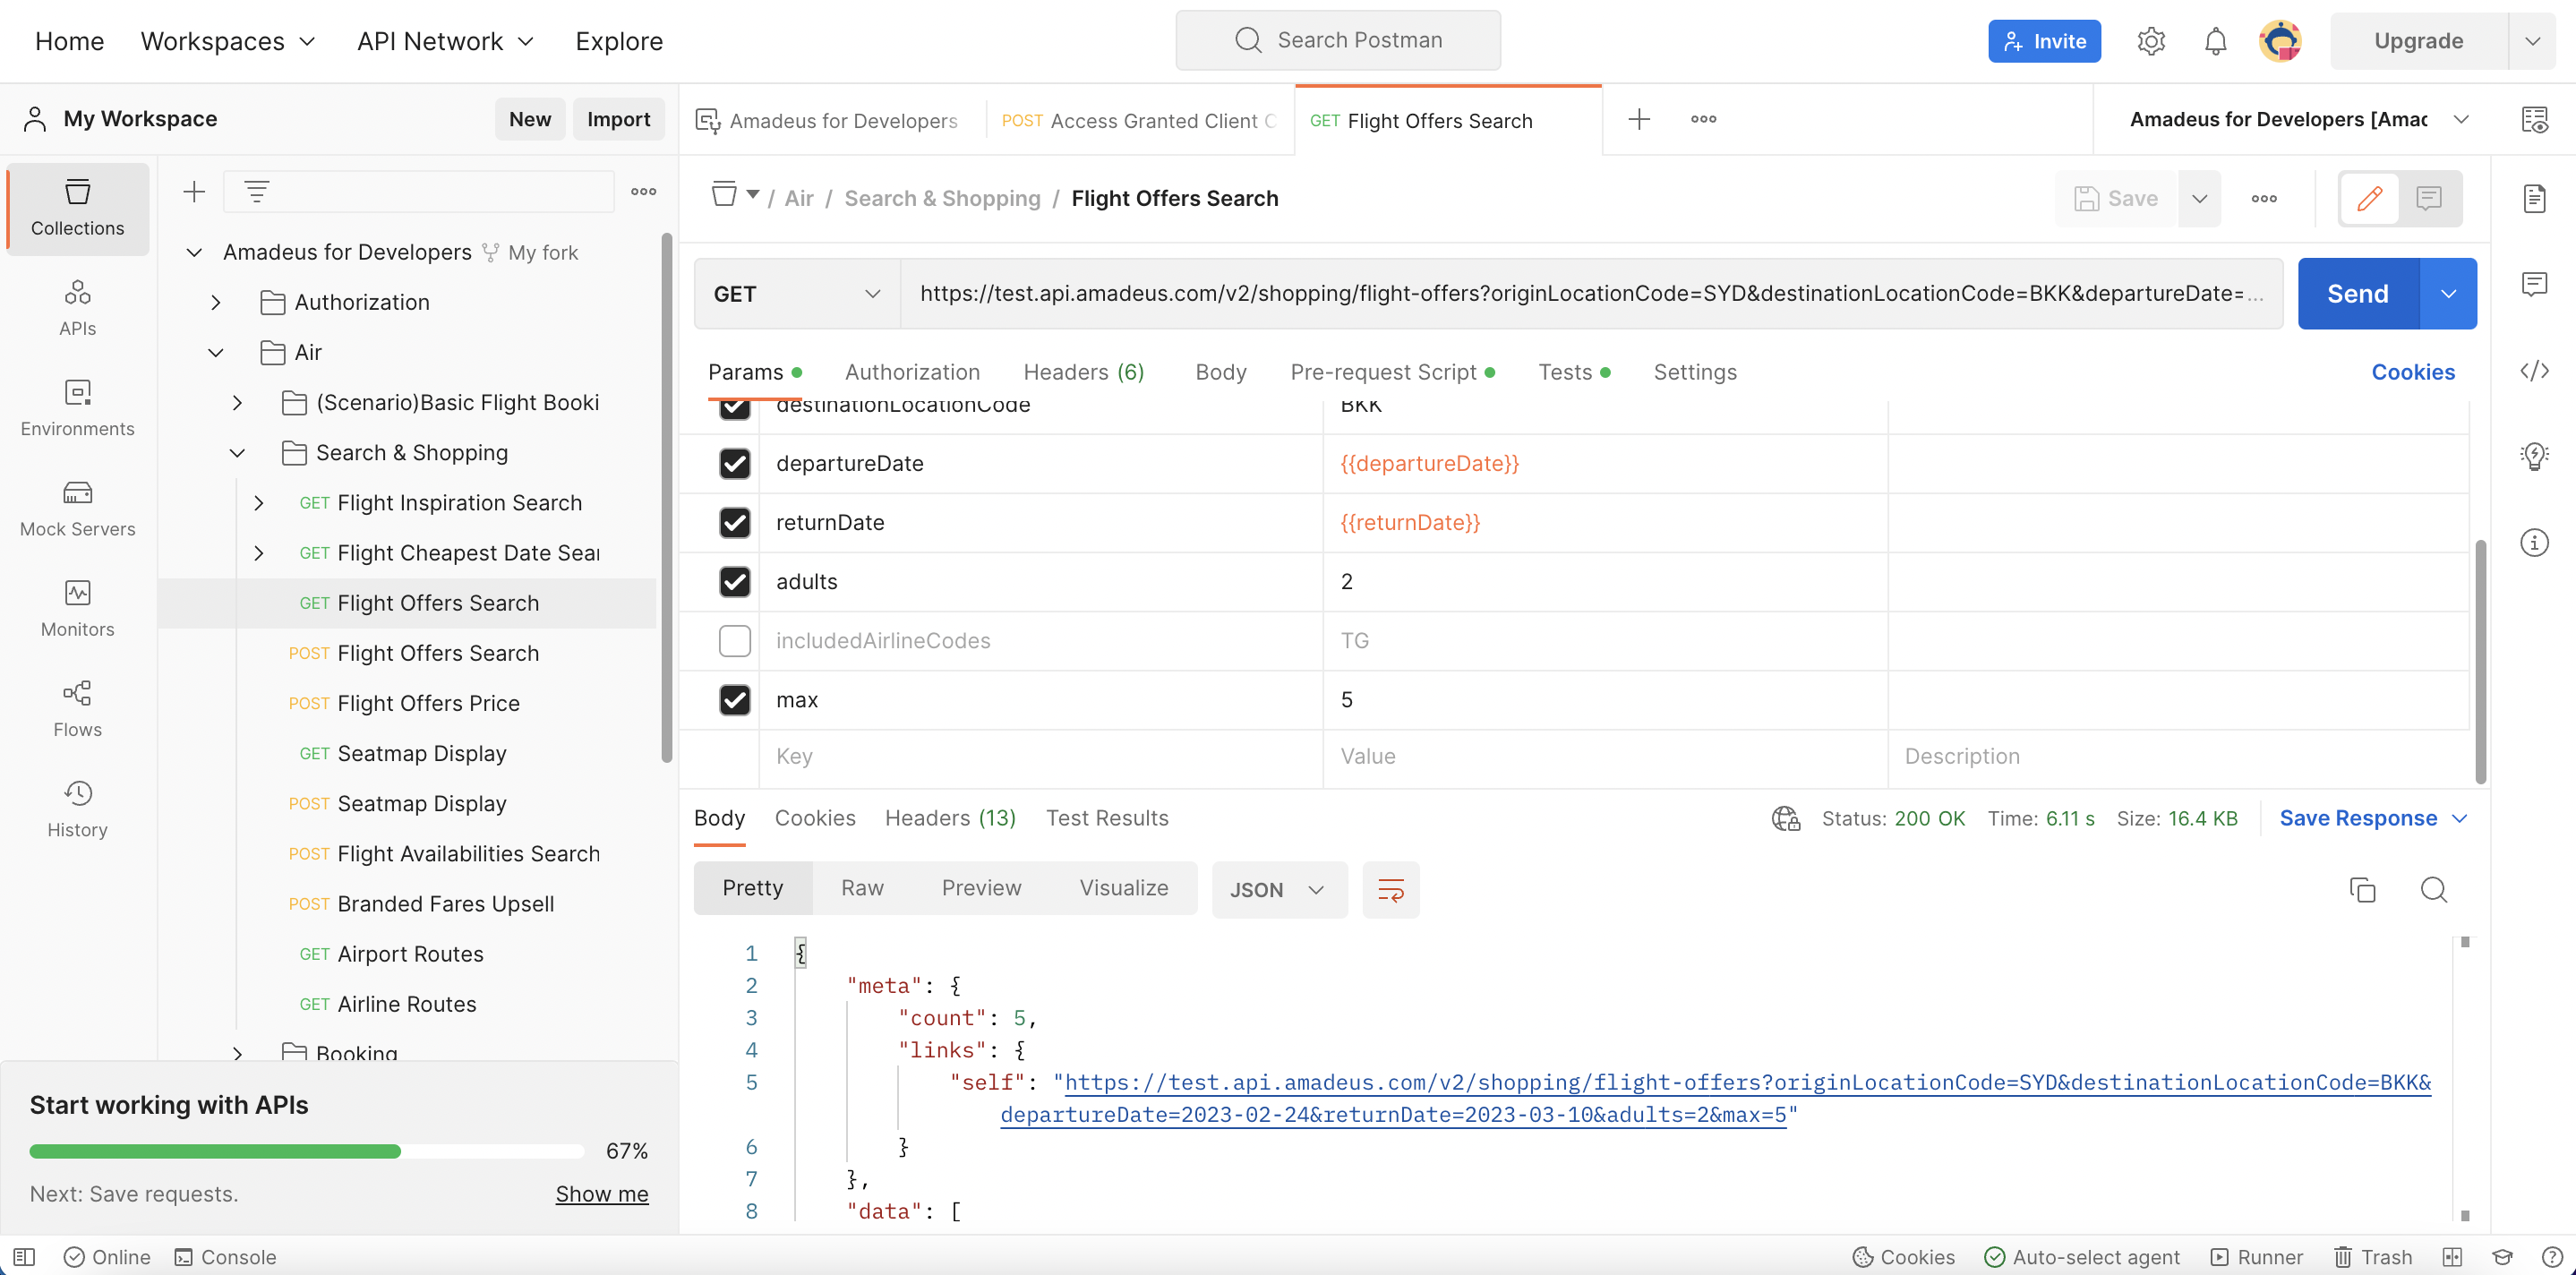
Make an API call
- Select the required API from the collection by navigating to the required endpoint on the left side bar. For example, Flights > Flight Booking > Flight Offers Search.
- Do not specify the
client_idandclient_secretparameters, as the access_token obtained previously is already linked to this API. - If required, specify the request parameters. Alternatively, you can try the API without setting any parameters, as we have already preconfigured it to display data for the upcoming month.
-
Click Send to make the call.
Make our preconfigured scenarios
To give you a smooth user experience that emulates the actual workflow of a flight and hotel booking engine, we have included Scenarios in the Flights and Hotels categories. A scenario combines all required APIs to achive a certain goal (e.g., book a flight) and uses data from each of the API's responses for calling the next API.
- Select the required scenario from the collection by navigating to the required category on the left side bar. For example, Air > (Scenario)Basic Flight Booking flow.
- Refresh the access_token by calling the Authorization API.
- Make a call to the Flight Offers Search to get the offer as a JSON object.
- Make a call to the Flight Offers Price to get the the price for the offer retrieved in the previous step. This API will automatically use the JSON object of the flight offer search.
- Make a call to the Flight Create Orders to create an order for the offer retrieved in the previous steps.
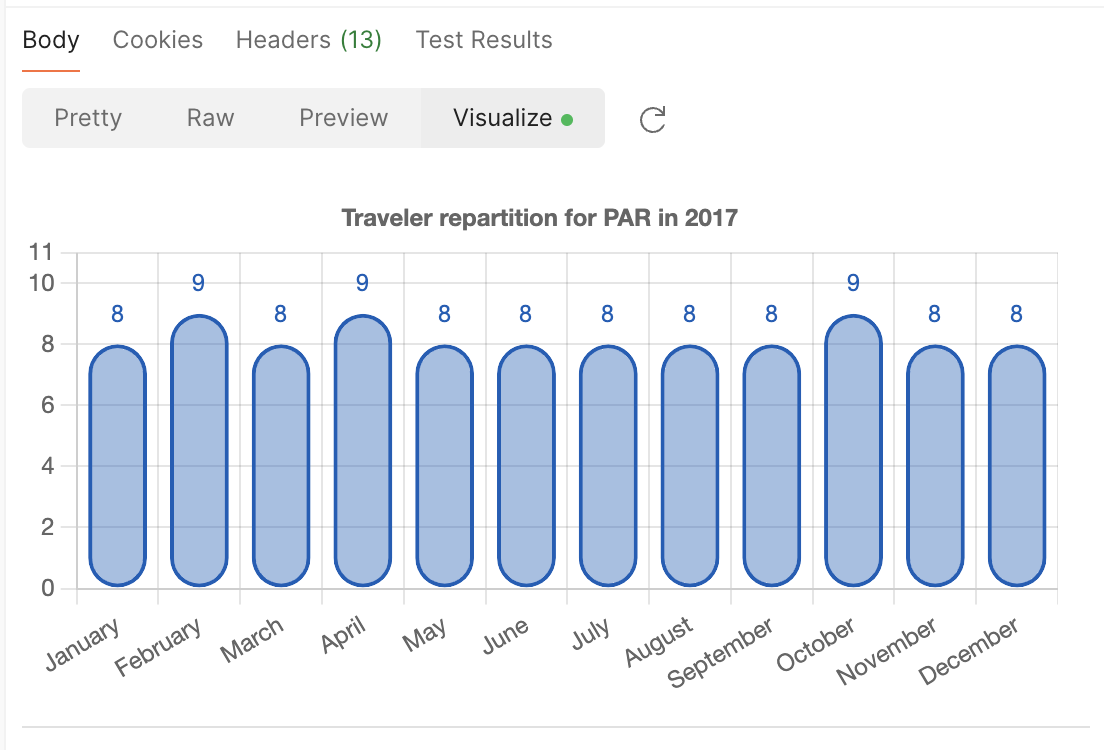
Visualize API responses
Some APIs in our Postman include a visualization to present the results graphically for better understanding and interpretation.
To access a visualization of an API:
- Select the required API from the collection by navigating to the required endpoint on the left side bar. For example, Market Insight > Flight Busiest Traveling Period.
- Specify the API parameters.
- Click Send to make the call.
-
Click Visualize at the bottom of the screen.